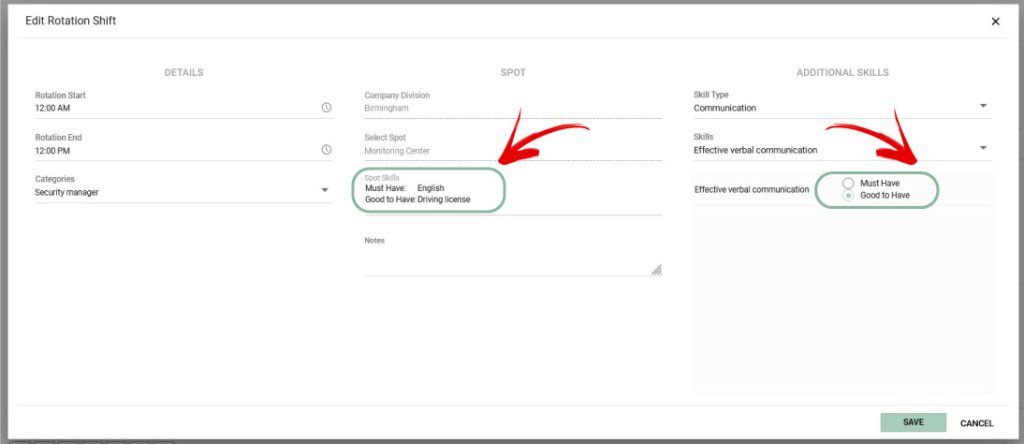
To create a rotation, click on the “Add Rotation” button on the Rotations page. A pop-up form will appear where you enter the following information:
DETAILS:
- Start time of the shift
- End time of the shift
- Employee category (optional)
SPOT:
- Company division (pre-selected)
- Spot – choose the spot where the shift will take place.
- Spot skills – once the spot is selected, you’ll see the required skills (must-have and good-to-have) of that spot. This helps you identify any additional skills needed for this specific rotation.
- Notes (optional)
ADDITIONAL SKILLS:
These skills complement the spot’s skills, and you can add any skills required for this particular rotation.
Choose the skill type and select the skill from the list. You can designate the skill as mandatory (Must-have) or optional (Good to have).

After filling in the necessary fields, click “Save,” and the rotation for the spot will appear on the Rotation page. Initially, all shifts of a newly created rotation are marked as “No Shift”.

You can then specify the days for active shifts and preferred employees (rotation employees) to cover them. Read more in the Managing Rotations section.
Defining a Rotation length:
The length of the rotation must be defined in the division settings and remains the same for all rotations within that division.
If not defined, the user receives the message: “Cannot create a rotation without a defined rotation length. Please go to Divisions and define the rotation length for this division. This can only be done by Admins”.


