Accessing Employee Page:
Click on “Employees” in the menu to open the Employees page. The page displays a list of all employees from the company divisions accessible to the user. All types of users can add employees and manage employee data.

Employee Information:
For each employee in the list, you can view the following details: Picture, First name, Last name, shortID, Color, Category(-ies), Phone number, Email, Company division, and Active status. You can filter the information by clicking on the corresponding Funnel icon in each column.
Viewing Employee Details:
To view detailed employee information, double-click on the employee in the list.
Adding an Employee:
To add an employee, click “Add.” A pop-up form will appear.
You need to provide Employee data, including:
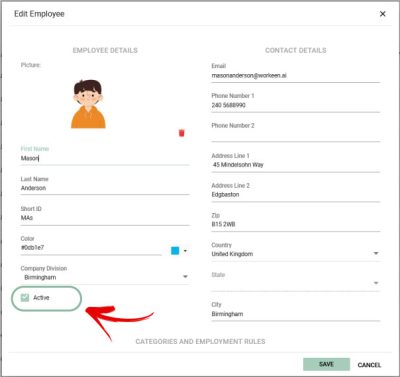
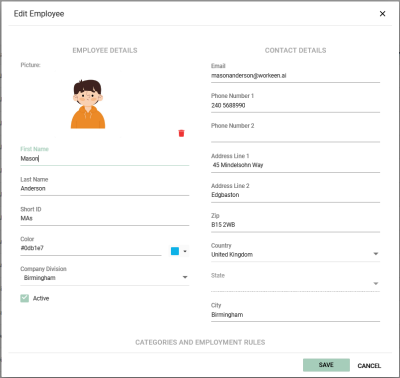
EMPLOYEE DETAILS:
- Picture (optional)
- First Name
- Last Name
- ShortID (optional) – if not entered, generated by the system
- Color
- Company Division
- Active
CONTACT DETAILS:
- Phone Number1
- Phone Number2 (optional)
- Address line1 (optional)
- Address line2 (optional)
- Zip (optional)
- Country (optional)
- State (optional)
- City (optional)
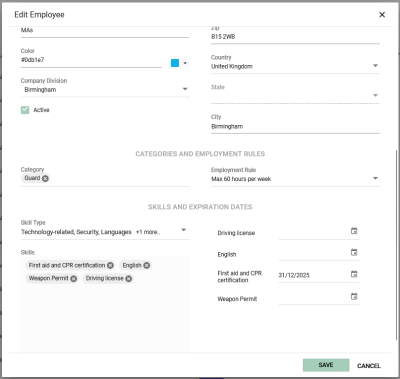
CATEGORIES AND EMPLOYMENT RULES:
- Category (optional)
- Employment Rule
SKILLS AND EXPIRATION DATES
- Skill type/Skill (optional)
- Expiration dates (optional) -The system will notify you in case of expiring or expired skills
Editing Employee Data:
Clicking on an employee in the list opens a pop-up form where you can view detailed information about the employee and make edits. You can also edit employee data by selecting the employee in the list and clicking on the “Edit” button. Please note that you cannot change the employee’s division.
Disabling and Deleting Employees:
To temporarily remove an employee from the system, uncheck the “Active” checkbox.
To delete an employee, select them in the list and click “Delete.”
Disabled and deleted employees are only visible in historical data.