To create a new shift, go to the Scheduling page and click on the “Create a shift” button or on the corresponding cell in the grid. A pop-up form will appear, where you can enter the following information:
DETAILS:
- Start date/time
- End date/time
- Category (optional)
EMPLOYEE:
- Employee (optional) – select an employee from the list, incliding employees of the selected company division
- Is Employee Pinned (becomes active once you select an employee) – If you use automatic scheduling, you can assign a specific employee using pinning, and this assignment won’t be changes with auto-scheduling.
- Original employee (not editable field) – only available in published shifts, indicating the employee to whom the shift has been published and who currently knows that they are assigned to it.
- Rotation employee (not editable filed) – an employee appears when the shift is created from a rotation with a rotation employee.
SPOT:
If you create a shift using the “Create a shift” button, you choose the spot where the shift will be performed. If you use a double-click to create a shift, the spot will be pre-selected.
Once the Spot is chosen, you will see the skills (must-have and good-to-have) needed for that Spot.
ADDITIONAL SKILLS:
Additional skills are complementary to the Spot’s skills and can be managed in two places: rotation and shift. You can select the additional skills needed for the particular shift.
Choose the skill type and select the skill from the list. The skill will be added to the Skill requirements list, where you can specify if the skill is mandatory (Must-have) or optional (Good to have).
You can also use the Notes field to add more information for the shift.
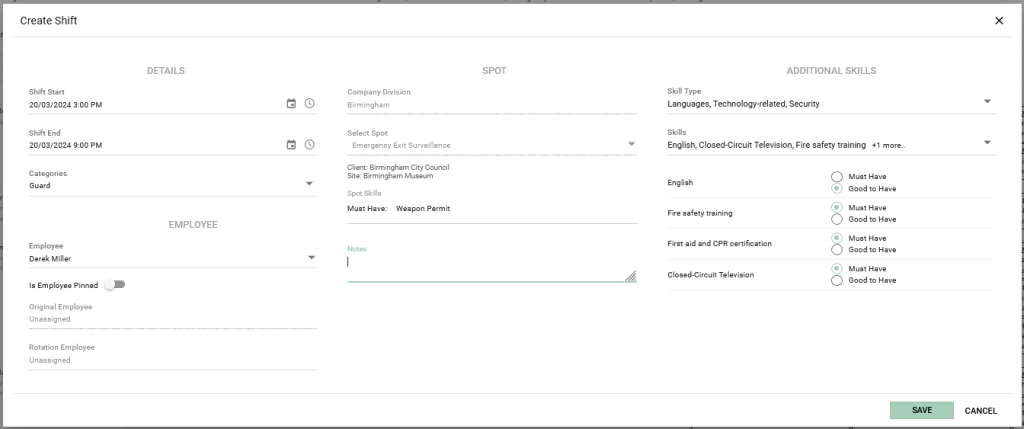
Once you’ve filled in the necessary fields, click “Save.” The shift will appear on the Scheduling page of the corresponding Spot.


