Sites are the physical locations where your clients’ work areas (Spots) are situated.
All users can view sites from upper, own, and subdivision levels. Division Admins have the authority to manage sites within their own divisions and sub-divisions, while the Global admin manages all sites within the system.
Accessing the Sites Page:
Click on “Clients > Sites” to access the Sites page. This page displays a list of all sites within the company divisions accessible to the user.

For each site, you can view its Name, Address, City, the associated Client and Company division. The information can be filtered by clicking on the corresponding Funnel icon in the grid.
Viewing Site Details:
To view detailed site information, double-click on the site in the list.
Adding and Modifying Sites:
As a Global or Division Admin, you can add and modify site data.
Adding a Site:
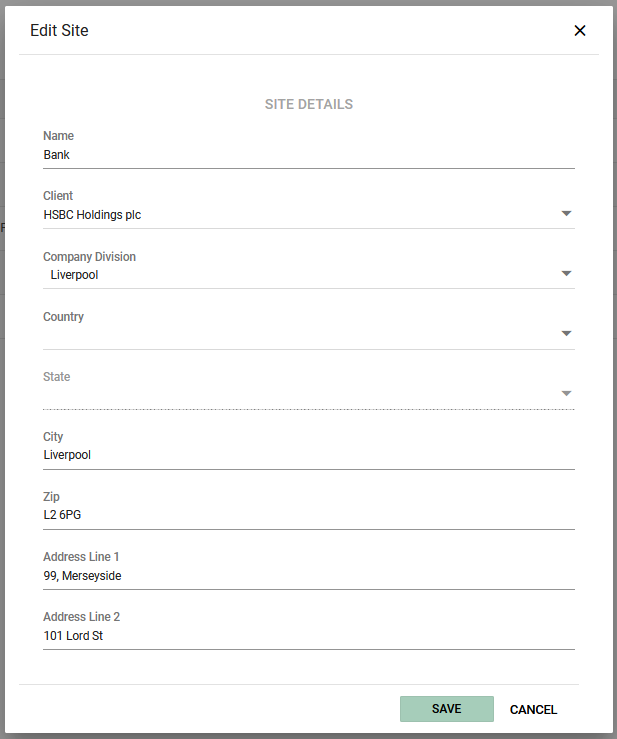
To add a site, click “Add.” A pop-up form will appear.
Provide Site Details, including:
- Name
- Client
- Company Division
- Country (optional)
- State (optional)
- City (optional)
- Zip (optional)
- Address Line 1 (optional)
- Address Line 2 (optional)
Note that there are restrictions on which divisions you can add the site to. Please be aware that there are limitations on which divisions you can associate the site with, and this association impacts the site’s accessibility to users at lower levels.
Editing Site Data:
To edit a site, either double-click on the site in the list or select it and click the “Edit” button to modify the data.
Note that there are restrictions on which divisions you can move the site to. Remember that association with a division impacts the site’s accessibility to users at lower levels.
Deleting Sites:
To delete a site, select it in the list and click “Delete.” Deletion is not possible if the site already has spots.


