When you click on “Rotations” in the menu, you’ll access the corresponding page for viewing and managing rotations. All user roles have the capability to view, create and manage rotations within the accessible bottom-level divisions.
Rotations are organized by spots. You’ll need to choose the company division (if you have access to more than one) and a spot from the selection boxes at the top of the page to view and manage its rotations. Upon opening the page, the first spot of the first company division (client and site, if applicable) is pre-selected.
Spot Skills: For the selected position, you can review the required skills, both must-have and good-to-have. This assists you in determining any supplementary skills necessary for each rotation you create.
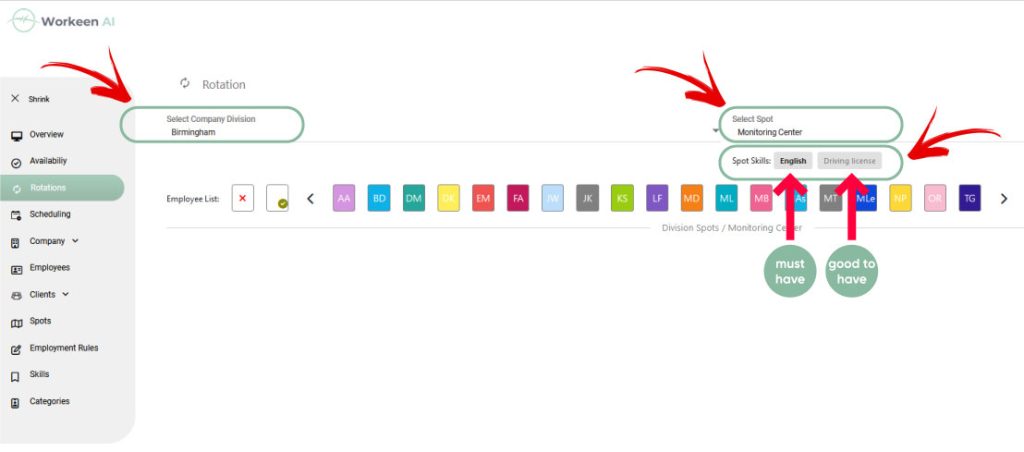
Employee List:
The initial icons represent “Unassigned Shift” and “No Shift.”
If there are employees in the selected division, you’ll also observe shifts with a specific employee initials. Hovering over these icons will display their full names. These are shifts with employees designated as preferred to work those specific shifts (so-called Rotation employees).

Rotations List:
If you have created rotations, they will appear in the central part of the Rotation page, listed in chronological order.

For each rotation, you can see:
- Start time and end time
- Category (if exists)
- Additional skills (if exists)- must-have and good-to-have, with must-have skills appearing in bold black letters
- Edit button for editing the rotation
- Delete button for deleting the rotation


